Although we have escaped the worst of Hurricane Irma - I have to say it has been a roller coaster ride this week. Our evacuation orders were rescinded, however, we still received some winds, rain, storm surge and tornado threats - much better than what they were predicting at the beginning of last week. We lived in central Florida for 20 years and have many friends and family still there - my heart goes out to them - let's remember them in our thoughts and prayers as we go about our day. Let's also pray Hurricane Jose stays out to sea - it's way too soon to go through this again.
Besides the weather threats here we are also having some much awaited cool temps and fall-like days. I have been anxiously awaiting these. With these cooler days, it feels more like Fall so I thought I would share my Fall Mantel decor with you all today.
Fall Mantel With Wood FALL Sign
I was at Hobby Lobby earlier this year when their fall items first came out and found this great wooden letter sign. I think it was about $6.99 but with their 40% discount coupon, you can get it for much less. I thought "why not?" and picked one up. I decided to decoupage the letters with some fall scrapbook papers I had on hand.
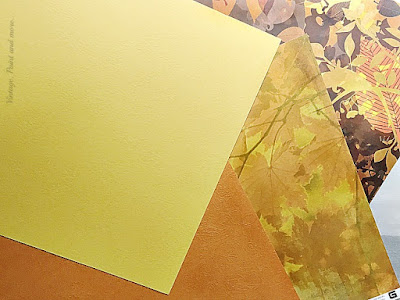
For this project you'll need some scrapbook papers. These are the ones I picked out to use but finally decided on the goldish print paper. These papers are some I had in my stash and are no longer available but, I am sure you can find some you love at your local craft store.
You'll also need a pair of scissors, a paint brush, craft paint of your choice and Mod Podge.
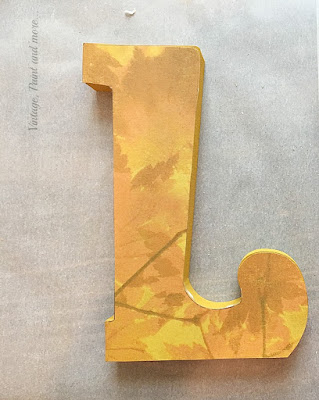
First, I painted the letters on all sides except the front with some craft paint. I used a harvest gold color that came closest to matching the paper. Then I simply traced each letter on the paper and cut them out. It only took one piece of 12 x 12 paper to do all 4 letters. Next, I coated the front of each letter with decoupage and smoothed the corresponding piece of paper on it. You can use an old credit card to smooth out any wrinkles you may get. Let it dry.
After they were completely dry I took a small piece of sandpaper and sanded all the edges around the scrapbook paper. You can see how the "distressing " looks after sanding it on the letter on the right.
The distressing changed it a lot but, I wanted them to look aged also. So, I used a Tim Holt Vintage distress ink and rubbed around the edges where I had just sanded to darken them and give them an aged look as you can see below.
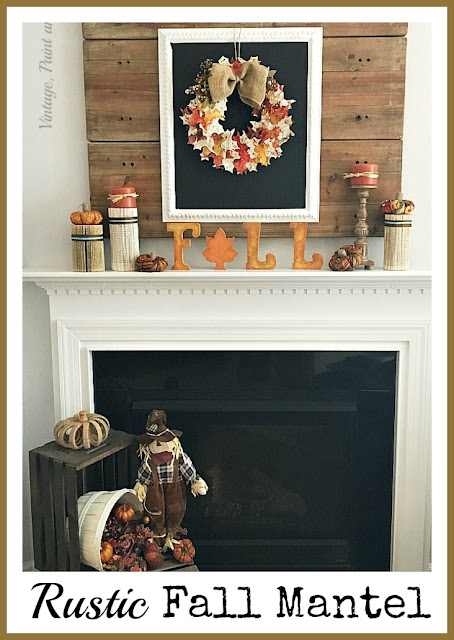
To put the mantel together I first started with a large chalkboard I hung on our rustic wood backdrop that lives over the fireplace. I made This one from an old picture I had. I simply painted the frame white and the glass with black chalkboard paint. These are very simple to make using old pictures or mirrors I find in thrift stores and I have several in different sizes I like to use through out the house. I use them to write quotes on or hang wreaths or just leave blank. They give the room that farmhouse touch I like.
On the blackboard I hung a paper leaf wreath I made a couple of years ago. I think this is one of my favorite wreaths I have made. It's just so Fall looking with its bright aged leaves, burlap bow and bits of berries and flowers. You can find the instructions to make this wreath here
On the mantel itself, I placed some book page columns I made - these are quite simple to make out of old paper back books, you can find the instructions here. On top of them I placed some of the little fabric pumpkins I made this year. Another simple project using bits of fabric I had in my stash - the tutorial for them can be found here.
In front of the fireplace, I placed two wood crates that I bought unfinished. I stained them and did some wood burned labels on each end. I will be sharing a tutorial on how to do this at a later date. On top of these, I placed an old bushel basket I painted white and filled it with bits of faux flowers, fall fruits and pumpkins. On top of the crate is my twine wrapped pumpkin. I will be sharing a
tutorial for it later also.
Here is a full view of the mantel with all these fun projects I completed. I love the Fall sign and the little fabric pumpkins I did this year but, I think the wreath is still my favorite.
What have you been making for Fall - I love to hear from you so tell me about it in the comments below.
Make sure you never miss anything by signing up for my emails in the bar at the top of the page.
If you like this post you may also like these:
Using Scarves in Your Decor
10 Great Fall Pillows Under $10
Colors of Fall


That is a great looking mantel! I love it. The FALL wood letters is my favorite. I like how you really aged the edges! found it through the creative inspiration party:) pinned!
ReplyDeleteThank you so much and thank you for pinning it.
DeleteThis is beautiful and I love the rustic theme. Great idea to decoupage the letters rather than paint them.
ReplyDeleteThank you Sandra. I love working with paper and decoupage is one of my favorite ways of doing so. Thank you for stopping by.
DeleteCathy,
ReplyDeleteThe Fall sign is just too cute with the leaf for an A. I like your choice of papers you used in decoupaging it. The Fall sign goes perfectly with your leaf wreath.
Judith
I love that little leaf and think it just be what sold me on picking this sign up. Thank you for stopping by.
DeleteYour Fall mantle is wonderful. Another tutorial! thanks! Glad Irma was good to you. I'll be glad when this hurricane season is over. Happy Fall!
ReplyDeleteThank you so much.
Deletevery nice mantle perfect for fall. I think the wooden word with tree is perfect as I always think of changing leaves as I am sure many do when they think of fall
ReplyDeletecome see us at http://shopannies.blogspot.com
Thank you so much - I also thought the leaf was a perfect sign of fall. Thanks for stopping by.
DeleteYour mantel has loads of rustic charm! Just lovely. So many great ideas for Fall, too. Thanks for the inspiration. (So glad you and your family made out well during Irma).
ReplyDeleteThank you Jelica.
DeleteCathy, everyone must be drinking the same tea! I've seen so many cute fall signs made with paper and letters. And I just made one myself. Yours is really nice. Love the frame. Thanks for sharing at Happiness is Homemade Link Party 189.
ReplyDeleteThank you Carol. Isn't it funny how things run in trends.
DeleteCathy, Your fall mantel is beautiful! So great to see some of your awesome older projects displayed too! Great job on the fall sign!
ReplyDeleteThank you Laurie. I like pulling out some of those older projects so I can enjoy them.
DeleteSo pretty, Cathy! I love the leaf for the letter A :) Thanks for sharing @Vintage Charm!
ReplyDeleteThank you, Cecelia. I think the leaf is what sold me on getting this sign.
DeleteYour mantel is perfect, Cathy! The wreath is gorgeous, and I think the book page columns are awesome!
ReplyDeleteI love your fall mantel Cathy. Thanks for sharing this at C&C with J&J.
ReplyDeleteThank you, Julie
DeleteEach picture has a wonderful detail that is so adorable. Love the wreath. I can see why it may be one of your faves! Saw this on The Scoop link party! Thanks for sharing.
ReplyDeleteThank you so much Cindy and thank you for stopping by.
DeleteOh your mantel is gorgeous and this sign is the perfect touch. Featuring when my party opens tonight!
ReplyDeleteThank you Carol and thank you for the feature.
ReplyDeleteI love, love, love your mantel...I have shared it over on FB! Where did you live in central Florida? I am in Celebration, and made it through with just a couple of trees down, a bunch of branches and leaves in the yard and a broken gate. We feel blessed! Thanks so much for sharing at Celebrate Your Story! I look forward to more of your holiday decor!
ReplyDeleteThank you so much Chloe. If we were still in Florida - we would be neighbors as I lived in Kissimmee. So glad to hear you had just a little damage from the storm.
DeleteLove your mantel and thanks for the how-to!
ReplyDeleteThanks also for sharing at AMAZE ME MONDAY!
Blessings,
Cindy
Thank you, Cindy and thank you for hosting each week.
Delete